Have I mentioned how much I love this project? I have? Well I do!
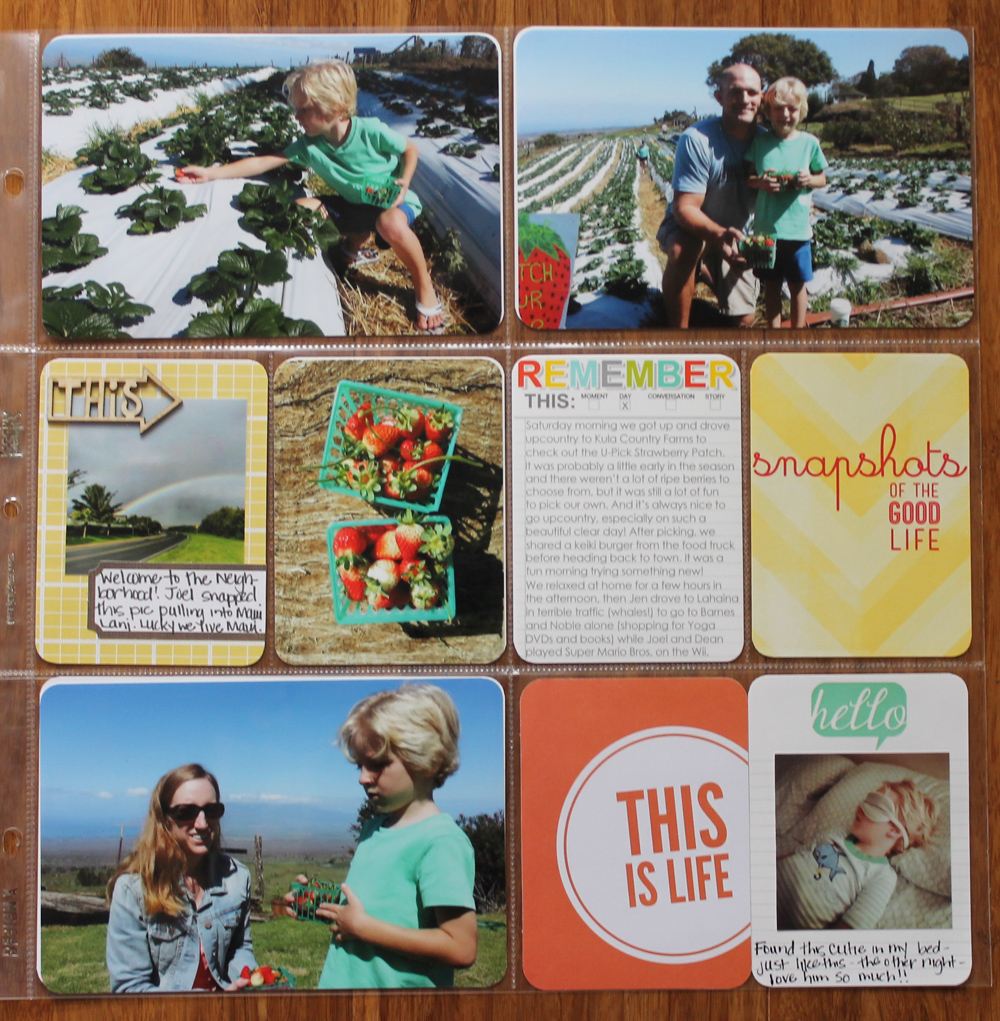
This was one of those weeks that is a perfect example of how I don't take a photo-a-day, but I feel like I have the perfect number of photos in my layout. I have 4 "everyday" photos and then 3 photos from the same beach trip on Sunday and then 4 photos from our adventure to the U-Pick Strawberry Patch on Saturday. So 2 days fill up the majority of the spread, but if I think back on our week, those 2 days were definitely the most memorable - so should get a little more layout real estate if you ask me. And I really like how this spread came together. Another bright and colorful week, but with no particular color scheme, just how I like 'em!
I also thought I would take a minute to talk cameras. While I do have a fairly nice dSLR camera, I haven't used it in MONTHS. For real. I don't have an iPhone either. I have a Samsung Galaxy SIII that I use to take 99.999% of my photos these days. No, not all of them are perfect, but they're good enough for me. I'm not a good enough photographer to want to lug around my dSLR all the time and honestly, I'm a bad enough photographer that I never take my good camera out of auto mode anyway, so I seriously can't tell much difference between the photos I take with it and the photos I take with my phone. The only difference is that I do notice that when I try to zoom in a lot on my phone, I lose more quality than I would if I zoomed in with my good camera. If we go on a trip or something, I'll take my good camera. But otherwise, I just don't mess with it. I'm sure Joel thinks this is a huge waste of money, but whatever. I'm still glad I have the dSLR, but I'm way more glad for the convenience of my phone's pretty great camera. Yes, I wish I had the time to learn more about my dSLR and become a better photographer, but I just don't. It's been on my "To-Do" list for years. It was on the list with my last 2 good dSLR cameras. Somehow I just don't think it's going to happen. And that's OK. 20 years from now I'm not going to care that all of my photos don't look like they were taken by a professional. The photos from my childhood for sure don't look professional! And I don't care about that at all. The memories captured in those photos are what's important. And that's why I'm doing this project. Every now and then when I see others' PL spreads with these amazing photos that look very professional, I feel a little twinge of envy. But then I see my son looking through my albums and I remember why I'm doing this. Just thought I'd share in case any of you sometimes feel the same. :-).

Looking at the left side of the layout, I used a 4x6 card from the Seafoam kit along with another printed circle from the
Word Art Titles from September Blue on my "anchor card" again this week. (you'll be seeing something totally different on my anchor card from Week 10, so stay tuned). In the top right pocket, I used a
Day to Day Tiny Tag from Elle's Studio, adhered directly onto the left edge of my 4x6 photo for journaling. I added a day of the week stamp (retired from Studio Calico) as well as a bicycle from the
Abroad Transportation Wood Veneer from Studio Calico for embellishment. The "Love This" 3x4 filler card is from the February Studio Calico Project Life kit.
Taking a look at the right side of the layout, where there are lots of photos from our trip to the Kula Country Farms U-Pick Strawberry Patch (if you're ever visiting Maui and driving along Kula Highway upcountry, do make a stop at
Kula Country Farms farm stand - they have fabulous locally grown produce at great prices and a DELICIOUS food truck - I'm partial to the Keiki Slider made with Maui grown grass fed beef and waffle fries - only $6 - a steal on Maui!). I used a few different printables by Geralyn Sy - available in her
In a Creative Bubble store - on this side.
And that's it for Week 9. So what do you think?
Also, I just found out that Google Reader is going away on July 1. So annoyed. I use Google Reader to get my blog fix every single day. I'd love suggestions for another reader. Do you use Google Reader? What will you use now? I don't even know what other options are out there!